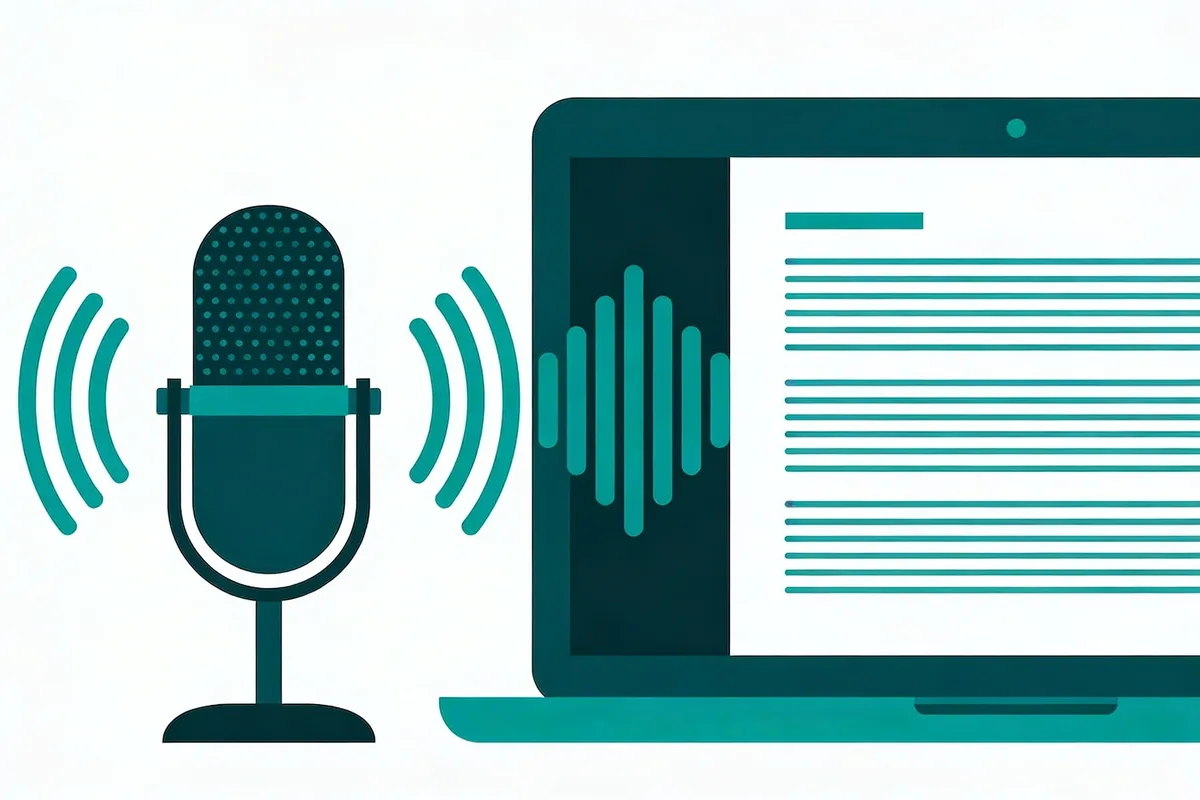
To transcribe a recording, upload your audio file to an AI transcription tool like TranscribeTube, select the language, and receive an editable text transcript within minutes. Modern AI transcription tools achieve over 95% accuracy on clear audio and process recordings at 3-5x real-time speed, making manual transcription largely unnecessary in 2026.
What you'll need:
- A recording in MP3, WAV, M4A, or MP4 format
- A computer, phone, or tablet with internet access
- A free TranscribeTube account (includes 40 minutes of free transcription)
- Time estimate: 5-15 minutes for a one-hour recording
- Skill level: Beginner-friendly
Quick overview of the process:
- Sign up for a free transcription tool — Create an account and get free transcription minutes
- Upload your recording — Drag and drop your audio or video file
- Select your language — Choose from 95+ supported languages
- Review and edit the transcript — Fix any errors while listening to the audio
- Export your transcript — Download as TXT, SRT, PDF, or DOCX
Understanding How Audio Transcription Works in 2026

Audio transcription converts spoken language into written text. It's used across industries for everything from creating meeting notes and generating subtitles to making content accessible for people with hearing impairments.
There are two main types of transcription you should know about:
Verbatim transcription captures every spoken word exactly as said, including filler words like "uh" and "um," false starts, and grammatical errors. Legal proceedings, qualitative research interviews, and court depositions typically require verbatim transcripts because exact wording carries legal or analytical weight.
Clean transcription (also called non-verbatim) removes those fillers, repetitions, and grammatical mistakes. You get a polished, readable document that preserves the speaker's meaning without the clutter. This works best for meeting notes, podcast show notes, and content repurposing.
According to Precedence Research, the global AI speech-to-text tool market was valued at $3.30 billion in 2025 and is projected to reach $16.42 billion by 2035. That growth reflects just how many professionals now rely on automated transcription daily.
What Is Speaker Diarization?
Modern transcription tools don't just convert speech to text. They can also identify different speakers in a recording and label each person's dialogue separately. This feature, called speaker diarization, is particularly valuable for multi-person meetings, interviews, and podcast episodes where you need to know who said what.

Manual vs AI Transcription: Which Method Should You Choose?

The old rule of thumb was a 4:1 ratio for manual transcription: four minutes of work for every one minute of audio. A 15-minute recording would take you roughly an hour. That math adds up fast when you're dealing with hour-long interviews or weekly team meetings.
AI transcription has changed the equation entirely. According to Verbit, most automated systems now complete transcription at 3-5x real-time speed, meaning a one-hour recording can be transcribed in 12-20 minutes. Verbit also reports that automated transcription accuracy rates have reached over 95% for clear audio.
Here's how the two approaches compare:
| Factor | Manual Transcription | AI Transcription |
|---|---|---|
| Speed | 4-6 hours per 1 hour of audio | 12-20 minutes per 1 hour of audio |
| Accuracy (clear audio) | 98-99% | 95-98% |
| Accuracy (noisy audio) | 90-95% | 70-85% |
| Cost | $1-3 per minute (professional service) | Free to $0.25 per minute |
| Speaker identification | Manual labeling required | Automatic diarization |
| Languages | Limited by transcriber's skills | 95+ languages supported |
For a deeper look at the data, check out our full AI vs manual transcription comparison.

When to choose manual transcription: Legal proceedings requiring certified transcripts, audio with extremely heavy accents or technical jargon, or recordings with severe background noise where AI struggles.
When to choose AI transcription: Meeting notes, podcast episodes, interview transcripts, content repurposing, subtitle generation, and any scenario where speed matters more than word-perfect accuracy.
Step 1: Sign Up and Get Free Transcription Minutes

Creating an account is the fastest step in the entire process. TranscribeTube offers 40 minutes of free transcription when you sign up, which is enough to transcribe two to three typical meetings or interviews before you decide whether to upgrade.
Detailed Instructions
- Go to TranscribeTube's sign-up page
- Click Sign Up and enter your email address
- Verify your email through the confirmation link
- Log in to your dashboard — your 40 free minutes are already loaded
Your free minutes don't expire, so you can take your time exploring the tool before committing to a paid plan.
What to Look For
You'll know it's working when: You see the dashboard with your transcription balance showing 40 minutes available and a "New Project" button ready to go.
Common Mistakes and Troubleshooting
Watch out for:
- Using a temporary email address: Some disposable email services get flagged during verification. Use your regular work or personal email for a smooth sign-up
- Skipping email verification: You won't be able to start transcribing until you click the verification link. Check your spam folder if it doesn't appear within two minutes
Pro tip: Building TranscribeTube taught me that most users underestimate their initial needs. If you're transcribing meeting recordings, a single weekly team standup can eat through 40 minutes in one shot. Start with your shortest recording to test the output quality before committing your free minutes to a long file.
Step 2: Navigate to Your Dashboard and Create a New Project

The dashboard is your central hub for all transcription projects. From here, you can see your previous transcriptions, start new ones, and manage your account.
Detailed Instructions
- From the dashboard, click New Project in the top navigation
- Select the type of file you want to transcribe:
- Audio File — for MP3, WAV, M4A, FLAC, OGG recordings
- Video File — for MP4, MOV, AVI, WebM files
- YouTube Video — paste a YouTube URL to transcribe directly

What to Look For
You'll know it's working when: You see the file type selection screen with options for audio, video, and YouTube URL input.
Common Mistakes and Troubleshooting
Watch out for:
- Choosing the wrong file type: If you select "Audio File" but upload a video, the tool will still extract and transcribe the audio track. But selecting the correct type ensures better processing
- Large file upload timeouts: Files over 500MB may take longer to upload on slower connections. If your upload stalls, try compressing the file first or splitting it into segments
Pro tip: If you're transcribing a YouTube video, skip the download step entirely. Just paste the URL and TranscribeTube handles the rest. I use this daily for transcribing podcast episodes and interview content.
Step 3: Upload Your Recording and Select the Language

This is where the actual transcription begins. You upload your file, pick the spoken language, and the AI engine processes your recording.
Detailed Instructions
- Drag and drop your audio or video file into the upload area, or click Browse to select it from your computer
- Select the language spoken in the recording from the dropdown menu. TranscribeTube supports 95+ languages including English, Spanish, Dutch, German, French, Turkish, and Korean
- Enable speaker identification if your recording has multiple speakers (this adds automatic labels like "Speaker 1," "Speaker 2")
- Click Start Transcription and wait for the processing to complete
According to CleverX, a one-hour user interview produces roughly 8,000 to 10,000 words of spoken content. AI transcription tools handle this volume in minutes rather than the hours it would take manually.
What to Look For
You'll know it's working when: A progress bar appears showing the transcription processing status. For a 30-minute recording, expect processing to take about 6-10 minutes.
Common Mistakes and Troubleshooting
Watch out for:
- Selecting the wrong language: If your recording is in Spanish but you select English, the accuracy will drop significantly. Double-check the language selection before hitting start
- Poor audio quality affecting results: Recordings with heavy background noise, echo, or multiple overlapping speakers will produce lower-quality transcripts. According to GoTranscript, on clean studio-quality audio, top AI engines reach 95-98% accuracy, but on real-world audio, accuracy often drops below 80%
Pro tip: Before transcribing an important recording, do a quick 30-second test segment first. This tells you immediately whether the audio quality is good enough for reliable AI transcription. I've saved hours of editing time by catching poor recordings early.
Step 4: Review, Edit, and Export Your Transcript

No AI transcription is perfect. The editing step is where you turn a good transcript into an accurate one. TranscribeTube's editor lets you play the audio while reading and correcting the text simultaneously.
Detailed Instructions
- Review the transcript — Read through the text while playing the audio. The text highlights in sync with the playback
- Click on any word to edit it — Type corrections directly in the transcript
- Use keyboard shortcuts for faster editing:
- Tab to play/pause
- Shift+Tab to rewind 5 seconds
- Export your transcript in your preferred format:
- TXT — plain text for general use
- SRT — subtitle file for video captioning
- PDF — formatted document for sharing
- DOCX — editable Word document
- Click Save in the upper right corner to preserve your edits
What to Look For
You'll know it's working when: The transcript text scrolls in sync with the audio playback, and your edits save without errors.
Common Mistakes and Troubleshooting
Watch out for:
- Skipping the review step entirely: Even with 95%+ accuracy, a one-hour transcript of 8,000 words can contain 200-400 errors. Always scan the output before using it
- Editing without audio playback: Context matters. A word that looks wrong on screen might actually be correct when you hear it spoken. Always edit with the audio playing
Pro tip: After building TranscribeTube, I've edited thousands of transcripts. The fastest workflow is to read the transcript at 1.5x playback speed and only stop to fix errors. Most mistakes cluster around proper nouns, technical terms, and cross-language words. Focus your attention there.
How to Transcribe a Recording on iPhone

If you've recorded audio on your iPhone using Voice Memos or the Notes app, you have several options for transcription without installing additional software.
Using Apple Notes (iOS 18+)
Apple added built-in transcription to the Notes app starting with iOS 18. Here's how to use it:
- Open Notes and create a new note
- Tap the microphone icon to record audio directly in the note
- After recording, tap the audio clip and select View Transcript
- The transcription appears below your recording
This method works entirely on-device, so your audio data stays on your iPhone. The accuracy is good for clear, single-speaker recordings in supported languages.
Using TranscribeTube on Mobile
For longer recordings or multi-speaker audio, you can use TranscribeTube directly from your iPhone's browser. It's the same process as described above: upload your file, select the language, and download the transcript. You can even transcribe Voice Memos from your iPhone by sharing the recording directly to the TranscribeTube upload page.
Limitations to Keep in Mind
Apple's built-in transcription doesn't support speaker diarization, timestamped transcripts, or export to SRT format. If you need any of these features, a dedicated audio to text converter gives you more control over the output.
How to Transcribe Audio to Text in Word and Google Docs

If you already work in Microsoft Word or Google Docs, you can transcribe recordings without leaving your word processor.
Microsoft Word Transcribe Feature
Microsoft 365 subscribers have access to a built-in Transcribe feature:
- Open a new or existing document in Word for the web (Office.com)
- Go to Home > Dictate > Transcribe
- Click Upload audio and select your recording file
- Wait for processing — Word will display the transcript with speaker labels and timestamps
- Click Add to document to insert the full transcript, or click individual sections to insert specific parts
According to Microsoft Support, users with a Microsoft 365 subscription can transcribe a maximum of 300 minutes of uploaded audio per month. Microsoft Copilot license holders get up to 30,000 minutes per month.
Google Docs Voice Typing (Live Audio Only)
Google Docs can convert speech to text in real-time, but it doesn't support uploading pre-recorded files:
- Open Google Docs and go to Tools > Voice Typing
- Select your language from the dropdown
- Click the microphone icon and start speaking
- Google transcribes your speech as you talk
Workaround for pre-recorded audio: Play your recording through your computer speakers while Voice Typing listens through your microphone. This isn't ideal — the quality depends on your speaker and microphone setup — but it works in a pinch for short recordings.
Which Word Processor Transcription to Choose?
| Feature | Microsoft Word Transcribe | Google Docs Voice Typing |
|---|---|---|
| Pre-recorded files | Yes | No (live only) |
| Speaker labels | Yes | No |
| Timestamps | Yes | No |
| Monthly limit | 300 min (M365) / 30,000 min (Copilot) | Unlimited (live only) |
| Offline | No | No |
| Best for | Meeting recordings, interviews | Quick dictation, short notes |
For transcribing audio to text from pre-recorded files with speaker identification and flexible export options, a dedicated transcription tool gives you more features than either word processor.
Best Free Tools to Transcribe Audio to Text in 2026

Beyond TranscribeTube's free audio-to-text converter, several other tools offer free transcription capabilities. Here's an honest comparison of the options available in 2026:
TranscribeTube
Built specifically for content creators and professionals who need fast, accurate transcription with AI-powered features.
- Free tier: 40 minutes of transcription
- Key features: Speaker identification, multi-language support, subtitle generation, AI summaries, YouTube URL transcription
- Best for: Podcasters, content creators, and teams who need both transcription and content repurposing tools
- Export formats: TXT, SRT, PDF, DOCX
Canva Audio to Text
Canva added an audio to text converter feature that integrates directly with their design platform.
- Free tier: Limited transcription within Canva's free plan
- Key features: Direct integration with Canva's video editor for adding captions
- Best for: Social media creators who already use Canva for design
- Limitation: Focused on short-form content and captions rather than full transcripts
Adobe Podcast Transcribe
Adobe offers a free transcription tool as part of their Podcast platform.
- Free tier: Free transcription with Adobe account
- Key features: Timestamped playback, word-level highlighting, easy copy-paste editing
- Best for: Podcasters already in the Adobe ecosystem
- Limitation: Fewer export format options compared to dedicated transcription tools
Evernote AI Transcribe
Evernote added AI transcription to its note-taking platform for users who want to keep recordings and transcripts in one place.
- Free tier: Limited transcription within Evernote's plans
- Key features: Integration with Evernote notebooks, multi-language support
- Best for: Researchers and students who organize notes in Evernote
- Limitation: Transcription is tied to the Evernote ecosystem
For a broader comparison, see our guide on AI transcription services.
Tool Comparison Table
| Tool | Free Minutes | Speaker ID | Languages | Export Formats | Best For |
|---|---|---|---|---|---|
| TranscribeTube | 40 min | Yes | 95+ | TXT, SRT, PDF, DOCX | Content creators, podcasters |
| Microsoft Word | 300 min/month (M365) | Yes | 30+ | DOCX | Office users |
| Apple Notes | Unlimited (on-device) | No | Limited | None (copy-paste) | Quick iPhone recordings |
| Canva | Limited | No | Limited | Integrated captions | Social media creators |
| Adobe Podcast | Free | No | Limited | TXT | Podcasters |
| Google Docs | Unlimited (live only) | No | 100+ | DOCX | Quick dictation |
Tips for Getting the Most Accurate Transcription Results

The quality of your transcript depends heavily on the quality of your recording. According to AssemblyAI, modern speech recognition systems achieve over 90% accuracy in optimal conditions. Here's how to push that number higher.
Record in a Quiet Environment
Background noise is the single biggest accuracy killer. Air conditioning hum, keyboard typing, traffic sounds, and other ambient noise confuse AI models. If you can't control your recording environment, use a directional microphone that focuses on the speaker rather than the room.
Use a Quality Microphone
Built-in laptop microphones pick up everything in the room. A USB condenser microphone (even a $30 one) dramatically improves clarity. For phone recordings, hold the device close to the speaker or use the speakerphone mode in a quiet room.
Speak Clearly and at a Moderate Pace
AI models handle natural conversation speed well, but very fast speakers or heavy mumbling trips up even the best engines. If you're recording an interview, ask participants to avoid talking over each other.
Choose the Correct Language Setting
This seems obvious, but it's a common mistake. Selecting English for a recording that contains both English and Spanish will produce poor results for the Spanish segments. If your recording is multilingual, transcribe it in the dominant language and manually correct the other segments.
Handle Unclear Audio Passages
Not every recording is crystal clear. When you encounter inaudible sections:
- Use context clues: The surrounding sentences often reveal what was said
- Cross-reference with notes: If you took meeting notes, check them against the transcript
- Mark unclear passages: Use [inaudible] or [unclear] tags rather than guessing. Wrong text is worse than marked gaps

Use Keyboard Shortcuts for Faster Editing
Every minute saved during editing adds up. Learn the keyboard shortcuts in your transcription tool — play/pause, rewind, fast-forward, and insert timestamps. In my experience, learning shortcuts cuts editing time by roughly 30%.

When to Upgrade from Free Tools to a Paid Transcription Plan

Free transcription tools work well for occasional use. But if you're transcribing recordings regularly, the limitations add up:
- Monthly minute caps restrict how much you can transcribe (Microsoft Word limits you to 300 minutes)
- Missing features like speaker diarization, batch processing, or API access aren't available on free tiers
- Export limitations may prevent you from getting the file format you need
According to Sonix, the global AI transcription market will grow from $4.5 billion in 2024 to $19.2 billion by 2034, driven by professionals who've discovered that paid transcription tools pay for themselves in time saved.
Consider upgrading when:
- You transcribe more than 2 hours per month — Free tiers become restrictive
- You need speaker identification — Essential for meetings and interviews with multiple participants
- You want API access — For integrating transcription into your workflow. See our guide on speech-to-text APIs for technical options
- You process content in multiple languages — Paid tools handle Dutch, Spanish, and other languages with higher accuracy
What Results to Expect After Transcribing Your Recording

After following the steps above, here's what you can realistically expect:
- Processing time: 5-15 minutes for a one-hour recording using AI transcription
- Accuracy: 93-98% on clear audio with a single speaker in a quiet environment. 75-85% on noisy recordings with multiple speakers and accents
- Editing time: Plan for 15-30 minutes of review and correction per hour of audio. This drops as you get familiar with your tool's quirks
- Output quality: A clean, timestamped transcript ready for sharing, publishing, or archiving
The AI transcription accuracy keeps improving with each model update. Tools that used 95% accuracy as their benchmark two years ago now regularly hit 97-98% on standard recordings.
How Does TranscribeTube Actually Transcribe a Recording?
When you upload a recording, TranscribeTube runs it through a speech model that handles 95+ languages and lands around 98% accuracy on clean audio, then drops you straight into an editor where you fix the rest while the audio plays. I designed it edit-first on purpose. Early on I tried to squeeze the last couple of percent out of the model itself, and it kept guessing wrong on the things that matter most: people's names, product jargon, and moments where two voices overlap. A human catches those in seconds; a model rarely does. So instead of hiding the raw output, we put it in front of you with the audio synced to the text, and let you correct as you listen.
For a recording with several people, speaker diarization separates the voices and labels each turn, so you're editing a conversation instead of one undivided wall of text.
Here's the honest limitation, and I'd rather say it plainly: heavy background noise, far-field mic audio (someone across the room), and speakers talking over each other still pull accuracy down. No post-processing step undoes a bad recording. If the input is muddy, the transcript will be too, and you'll spend more time in the editor. Clean audio in beats any cleverness on our end. That's why every "record well" tip above earns its place.
Frequently Asked Questions
How do I transcribe a recording on iPhone without paying?
Use the built-in transcription feature in Apple Notes (iOS 18+). Open Notes, record audio, and tap "View Transcript." For longer recordings or better accuracy, TranscribeTube's free tier offers 40 minutes of transcription that you can access from your iPhone's browser.
Can I transcribe audio to text for free?
Yes. TranscribeTube offers 40 free minutes, Microsoft Word includes 300 minutes per month with a Microsoft 365 subscription, and Google Docs provides unlimited live voice typing. Apple Notes transcribes on-device for free on iOS 18+.
How long does it take to transcribe a one-hour recording?
With AI tools, 12-20 minutes of processing time. Add 15-30 minutes for review and editing, and you're looking at about 30-50 minutes total. Manual transcription takes 4-6 hours for the same recording.
What is the best free AI transcription tool in 2026?
It depends on your use case. TranscribeTube is strongest for content creators needing speaker identification and subtitle export. Microsoft Word Transcribe works well for Office users. Apple Notes is most convenient for quick iPhone recordings. For a detailed breakdown, check our AI transcription services comparison.
How do I transcribe audio to text in Word?
In Word for the web, go to Home > Dictate > Transcribe, upload your audio file, and wait for processing. You'll get a timestamped transcript with speaker labels. You need a Microsoft 365 subscription, and you're limited to 300 minutes of uploaded audio per month.
What audio format works best for transcription?
WAV and FLAC produce the best results because they're uncompressed formats that preserve audio quality. MP3 works well for most recordings. M4A (iPhone's default format) is also supported by most transcription tools. Avoid highly compressed formats or audio ripped from low-quality video.
How accurate is AI transcription compared to human transcription?
On clean, single-speaker audio, AI transcription reaches 95-98% accuracy. According to Brass Transcripts, the average AI platform achieves about 62% accuracy on typical business audio with multiple speakers and background noise. Professional human transcription typically delivers 98-99% accuracy regardless of conditions, but costs significantly more and takes hours instead of minutes.